How to Move Your Family to a New House in Skyrim

Moving an object in Unity can be very straightforward.
It typically involves modifying the properties of an object's Transform component, which is used to manage a game object'due south scale, rotation and position in the world.
However, there are many unlike means you tin do that…
And while well-nigh methods of moving an object in Unity involve modifying the object'south Transform in some way, the verbal method you use will vary depending on the type of motility you want to create.
But don't worry, considering in this article, yous'll learn how and when to use each of the different methods for moving an object in Unity, and then that you lot can use the ane that's correct for your project.
Hither's what y'all'll find on this page:
- How to move an object in Unity
- How to use Transform Interpret in Unity
- How to movement an object with the keyboard in Unity
- How to motility an object, relative to the camera
- How to motion an object to a position in Unity
- How to move an object to a position at a fix speed (using Movement Towards)
- How to movement an object to a position in a set time (using Lerp)
- How to movement an object to a position using animation
- How to move an object using physics
Allow's become started.
How to move an object in Unity
The most straightforward method of changing an object's position in Unity is to prepare information technology directly, which will instantly movement information technology to a new vector iii position in the world.
This works by setting the Position property of an object's Transform component to a new position.
Like this:
// Moves an object to the fix position transform.position = new Vector3(10, 0, 5); Or y'all can add a vector to an object's position, to move information technology by a set amount in a specific direction.
Like this:
// Moves an object up 2 units transform.position += new Vector3(0, 2, 0); Which looks similar this:

Adding a vector to an object'south position moves it by that amount.
It's possible to modify the properties of an object's Transform from a script that's attached to information technology past using the Transform Property:
Transform myTransform = transform; The Transform holding, which is typed with a lower instance 't', allows you to reference the Transform component of an object from a script that's attached to it, without getting a reference to it first.
Which is useful, equally it allows you lot to easily reference, or change, an object's ain position from a script.
Similar this:
Vector3 myPosition = transform.position; Modifying a Transform'south position is the well-nigh straightforward method of creating movement in Unity.
Either past modifying it direct, over time, or by using the Interpret function which allows you to motility an object in a specific direction.
How to use Transform Interpret in Unity
The Translate role in Unity moves an object by a fix amount, relative to its current position and orientation.
Like this:
void Starting time() { // Moves the object forward two units. transform.Interpret(0,0,2); } This is different to simply calculation a vector to the object'due south position, which would move it relative to globe infinite, while Interpret will, by default, move an object relative to its ain local space.
This means that, when using Interpret, passing in a forward vector will move the object in the direction of its bluish axis, the Z-Axis.
When it's chosen once, Translate moves an object by a set amount i fourth dimension.
However, by calling information technology every frame, it's possible to create continuous movement.
Like this:
void Update() { // Moves the object forwards 2 units every frame. transform.Interpret(0,0,2); } All the same, at that place's a trouble with this method.
Because framerates vary between devices and, because each frame often takes a dissimilar amount of time to procedure than the last, the speed of an object'southward movement would change depending on the framerate when moving an object in this way.
Instead, multiplying the movement amount by Time.deltaTime, which is the amount of time since the terminal frame, creates consistent movement that'due south measured in units per second.
Like this:
void Update() { // Moves the object forward at two units per second. transform.position = new Vector3(0,0,ii) * Time.deltaTime; } Which looks like this:

Adding a scaled vector over time creates movement.
This works fine, however, it tin sometimes be more convenient to manage movement direction and speed separately, past using a Unit of measurement Vector to determine the direction and a separate bladder value to control the speed.
Like this:
public float speed = 2; void Update() { // Moves the object forward at two units per 2nd. transform.Interpret(Vector3.forward * speed * Time.deltaTime); } This has the same effect as manually typing out the vector, except that the speed is at present carve up and can hands be changed.
In this example, Vector3.forward is shorthand for (0,0,1) which is the forward management in world infinite.
Multiplying Vector3.forward by the speed value, in this example ii, creates the vector (0,0,2) which, when multiplied by Delta Time, creates a forward movement of two units per 2d.
The result is the same as when manually typing out the vector, except that the speed is now dissever and tin hands exist controlled.
Management vectors in Unity
A normalised vector, or unit of measurement vector, in Unity is simply a vector with a length of 1 that describes a direction. For instance the unit vector (0,0,1) describes the forward management in world space.
Normalised vectors tin exist extremely useful for calculating distance and speed.
For example, you could multiply a unit of measurement vector by 10 to go a position that's ten units away in a certain direction.
Or you can multiply a vector by a speed value and by Delta Time to create movement at an exact speed in units per second.
While yous tin blazon unit vectors manually, yous'll observe a number of autograph expressions for common directional vectors in the Vector 3 class.
For case:
Vector3.forward // (0, 0, 1) Vector3.dorsum // (0, 0, -one) Vector3.upwardly // (0, 1, 0) Vector3.down // (0, -i, 0) Vector3.right // (1, 0, 0) Vector3.left // (-1, 0, 0) These relate to mutual directions in globe space, however, it's also possible to get a normalised direction vector relative to an object's local position and rotation.
Like this:
transform.forrard // object forward -transform.forward // object back transform.upwards // object upward -transform.up // object down transform.right // object right -transform.right // object left These tin exist extremely useful for creating object relative move.
Such as moving an object forward in the direction that information technology's facing.
Similar this:
public bladder speed = 2; void Update() { // Moves an object forward, relative to its own rotation. transform.position += transform.forward * speed * Time.deltaTime; } In this case, the object is still moving forward at a speed of 2 units per second.
The difference is that the direction is based on the object's orientation, not the world. Which ways that if the object rotates, it'll turn as it moves.
Still…
While using a Transform's local directions tin exist useful for getting the orientation of a specific object, some functions already operate in local space past default.
Such every bit the Translate office which, by default, applies movement relative to the object'south local position and orientation, unless y'all set otherwise.
Which means that, if you utilise transform.forward with the Translate part, you'll get a compounded upshot, where turning the object throws off its forrad vector.
Creating object-relative movement in this way tin can exist useful for adding player controls, where the role player can motion an object forrad, backwards or sideways using input axes, such as from the keyboard.
How to motility an object with the keyboard in Unity
To move an object with the keyboard, or with any other input device, only multiply the direction of movement you desire to apply, such every bit frontwards, for example, past the Input Axis y'all want to employ to control it.
In Unity, when using the default Input Manager, you'll find an Input Centrality for Horizontal and Vertical movement already set up and mapped to the WASD keys and pointer keys on the keyboard.
- Input in Unity fabricated easy (a complete guide to the new system)
Each axis returns a value between -i and one, which ways that you can use the value that's returned to create a movement vector.
Like this:
public bladder speed = two; void Update() { float x = Input.GetAxis("Horizontal"); bladder z = Input.GetAxis("Vertical"); Vector3 movement = new Vector3(x, 0, z); transform.Translate(motion * speed * Fourth dimension.deltaTime); } This allows you to create object-relative movement controls using the keyboard or any other input device.
Which looks like this:

The Horizontal and Vertical input axes tin be used to create motility control.
Fifty-fifty movement controls with Clamp Magnitude
When moving an object using horizontal and vertical axes it's possible to create diagonal movement that is faster than the speed of move of a unmarried centrality.
This is because the length of the vector that's created from a forward vector of 1 and a sideways vector of ane is longer than either one on their own, at around 1.4.
Which ways that holding forward and right on a keyboard, for example, would move the histrion 1.four times faster than just moving forwards or sideways solitary, causing uneven 8-style move.
So how tin you ready it?
One option is to normalise the vector, like this:
Vector3 movement = new Vector3(x, 0, z).normalized; However, while this does work, it means that the length of the vector is ever one, meaning that whatever value less than one, such as counterpart movements, or the gradual acceleration that Unity applies to digital centrality inputs, is always rounded up to i, no matter what.
This might not be a problem for your game if, for example, you're using the Raw Input values and are deliberately creating tight digital controls.
Otherwise, to also support values that are lower than 1, you can limit the length of the vector instead, using Clamp Magnitude.
Like this:
public float speed = 2; void Update() { float x = Input.GetAxis("Horizontal"); float z = Input.GetAxis("Vertical"); Vector3 movement = new Vector3(x, 0, z); move = Vector3.ClampMagnitude(motion, 1); transform.Translate(movement * speed * Time.deltaTime); } This volition limit the length of the vector to ane, while leaving lower values intact, allowing you to create analogue 8-fashion motion that'due south even in all directions.
The Translate function creates move that's relative to the Transform component that it'south called from.
However, y'all may non always want to create player-relative movement.
So how can you move an object in a management that'south relative to a dissimilar object, such every bit the photographic camera, for case?
How to move an object, relative to the camera
It'due south possible to motion an object relative to the position of the photographic camera in Unity by using the camera's forward vector in place of the object'southward forwards vector.
Like this:
public float speed = 2; void Update() { Transform camTransform = Camera.chief.transform; Vector3 forwardMovement = camTransform.forwards * Input.GetAxis("Vertical"); Vector3 horizontalMovement = camTransform.right * Input.GetAxis("Horizontal"); Vector3 motion = Vector3.ClampMagnitude(forwardMovement + horizontalMovement,1); transform.Interpret(movement * speed * Time.deltaTime, Space.World); } Because the movement is relative to the camera'south position, the Relative To parameter in the Translate part needs to be set to Earth Infinite for this to work.
However, there's a problem…
The forward vector of the camera may, in some cases, be facing at an angle, downward towards the thespian, meaning that any movement that's applied volition also push downwards, instead of along a flat airplane, as you might expect.
To ready this, you'll demand to manually calculate the management betwixt the photographic camera and the object, while leaving out any rotation that you lot want to ignore.
To calculate a direction, all you need to do is subtract the position of the origin from the position of the target and then, normalise the result.
Like this:
Vector3 management = (transform.position - Camera.master.transform.position).normalized; To ignore the deviation in peak betwixt the camera and the object it's looking at, just create a new Vector three that replaces the camera'southward height with the object'south instead.
Similar this:
Transform camTransform = Camera.primary.transform; Vector3 camPosition = new Vector3( camTransform.position.ten, transform.position.y, camTransform.position.z); Vector3 direction = (transform.position - camPosition).normalized; This will return a direction that is looking towards the object, but isn't looking up or down.
You tin and then use the corrected management that'due south created to calculate movement that'south relative to the photographic camera on a flat plane.
Similar this:
public float speed = 2; void Update() { Transform camTransform = Camera.primary.transform; Vector3 camPosition = new Vector3(camTransform.position.x, transform.position.y, camTransform.position.z); Vector3 management = (transform.position - camPosition).normalized; Vector3 forwardMovement = direction * Input.GetAxis("Vertical"); Vector3 horizontalMovement = camTransform.right * Input.GetAxis("Horizontal"); Vector3 movement = Vector3.ClampMagnitude(forwardMovement + horizontalMovement, 1); transform.Translate(motility * speed * Fourth dimension.deltaTime, Space.Globe); } Which looks like this:

You can create photographic camera relative movement by using the camera's forward direction in place of the object'south.
By understanding the relative direction of an object, it's possible to create any kind of movement command that you want.
However, a lot of the time, y'all may want to move an object in a unlike manner, that'south non directly controlled by the histrion.
For example, moving an object to a set position or towards another object.
How to movement an object to a position in Unity
By and large speaking, in that location are two different means to move an object into a specific position.
- By speed, where the object moves towards a target at a specific speed,
- By fourth dimension, where the motion between the ii points takes a specific amount of fourth dimension to complete.
The method you apply will depend on how yous want to command the object's movement, by time or by speed.
Here'southward how both methods piece of work…
How to motility an object to a position at a gear up speed (using Move Towards)
It's possible to motion an object towards another object or a specific position in the scene using the Motion Towards function.
Motility Towards is a function of the Vector iii Class that will modify a Vector 3 value to motion towards a target at a prepare speed without overshooting.
Which works neat for moving an object towards a position in the world at a speed you lot can control.
Similar this:
public Vector3 targetPosition; public bladder speed=10; void Update() { transform.position = Vector3.MoveTowards(transform.position, targetPosition, speed * Time.deltaTime); } The movement can too be smoothed, past using the Smoothen Damp function, which eases the movement as it starts and ends.
Like this:
public Vector3 targetPosition; public float smoothTime = 0.5f; public bladder speed = 10; Vector3 velocity; void Update() { transform.position = Vector3.SmoothDamp(transform.position, targetPosition, ref velocity, smoothTime, speed); } This works by setting the position of the object to the Vector three upshot of the Smooth Damp office, passing in a target, the current position and a reference Vector 3 value, which the function uses to process the velocity of the object between frames.
This tin be useful for smoothed continuous movement, where the target position may change from one moment to the next such as when following the player with a camera.
Such as in this instance of a smooth camera follow script using Smooth Damp:
public Transform player; public bladder cameraDistance = 5; public float cameraHeight = 3; public bladder smoothTime = 0.5f; public float speed = 10; Vector3 velocity; void Update() { transform.LookAt(player.transform); Vector3 offset = (Photographic camera.chief.transform.position - player.position).normalized * cameraDistance; Vector3 targetPosition = thespian.position + showtime; targetPosition.y = cameraHeight; transform.position = Vector3.SmoothDamp(transform.position, targetPosition, ref velocity, smoothTime, speed); } In this example, the camera will smoothly motility towards the thespian and plow to face them, while keeping at a summit of 3 units and trying to stay at a distance of 5 units away.
Move Towards works great as a way to move an object towards a position dynamically.
This is because the move is speed-based, and can exist controlled fifty-fifty if the target position moves or is unknown.
Nevertheless, in that location are many times where you may simply want to motility an object to a known position over a set menstruation of time.
Such as moving a platform, or opening a door.
So how so you create time-based movement in Unity?
How to motility an object to a position in a ready fourth dimension (using Lerp)
Lerp, or Linear Interpolation, is used to discover a value between a minimum and maximum based on a position value, 't', which is a float betwixt naught and ane.
The value that's returned depends on the value of t where, if t is 0 the minimum value is returned, while 1 returns the maximum value.
Any other value in-between 0 and 1 volition render a representative value between the minimum and maximum ends of the calibration.
float lerpedValue = Mathf.Lerp(float minValue, float maxValue, float t); Typically, Lerp is used to change a value over a menstruum of time, by incrementing t every frame to return a new value on the scale.
This can be used to change a colour, fade an audio source or move an object between two points.
- The right way to utilise Lerp in Unity (with examples)
It works by passing in the amount of time that has elapsed during the Lerp, divided by the full elapsing. This returns a 0-1 float that can be used for the t value, and allows you to control the length of the Lerp movement by just choosing how long y'all'd like it to take.
Like this:
float timeElapsed; float lerpDuration = 3; float lerpedValue; void Update() { if (timeElapsed < lerpDuration) { lerpedValue = Mathf.Lerp(0, 100, timeElapsed / lerpDuration); timeElapsed += Fourth dimension.deltaTime; } } Vector3.Lerp works in the aforementioned way except that, instead of returning a float, information technology returns a signal in the earth between two others, based on the t value.
This can be useful for moving an object between two different positions, such as a door with an open and closed state.
Like this:
public bladder openHeight = 4.5f; public float duration = 1; bool doorOpen; Vector3 closePosition; void Start() { // Sets the first position of the door as it's closed position. closePosition = transform.position; } void OperateDoor() { StopAllCoroutines(); if (!doorOpen) { Vector3 openPosition = closePosition + Vector3.up * openHeight; StartCoroutine(MoveDoor(openPosition)); } else { StartCoroutine(MoveDoor(closePosition)); } doorOpen = !doorOpen; } IEnumerator MoveDoor(Vector3 targetPosition) { float timeElapsed = 0; Vector3 startPosition = transform.position; while (timeElapsed < duration) { transform.position = Vector3.Lerp(startPosition, targetPosition, timeElapsed / duration); timeElapsed += Fourth dimension.deltaTime; yield return null; } transform.position = targetPosition; } In this instance, I've used a coroutine to move the door object up past a set altitude from the door's starting position, whenever the Operate Door part is called.
Which looks like this:

Lerp can be used to movement an object between 2 states, such as the open and closed positions of a door.
This creates a linear movement from one position to another, however, it's besides possible to smooth the Lerp's motility using the Smooth Step function.
This works by modifying the t value with the Smooth Step office before passing it into Lerp.
Like this:
float t = Mathf.SmoothStep(0, one, timeElapsed / moveDuration); This will ease the movement of the object at the beginning and end of the Lerp.
How to move an object to a position using animation
Depending on how you'd similar to command the motility of objects in your game, information technology can sometimes be easier to simply animate the object you lot'd like to move.
This typically involves modifying properties of an object and storing them in Keyframes, which are then smoothly animated between over time.
For example, you lot could utilise animation to move an object between two points, such every bit a floating platform.
This would need three Keyframes to work, 1 for the starting position, another for the platform's end position and a final Keyframe to render the platform to its original position, looping the animation.
To animate an object y'all'll demand to add together an Animator and an Animation Clip, which you tin do from the Animation window.

Adjacent, select a position on the Animation Timeline, this will exist the position of the 2nd Keyframe, when the platform is furthest away..
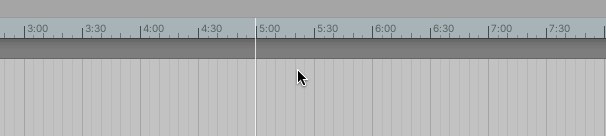
Assuming that, at zip seconds, the platform is at its starting position, this volition be the halfway point of the animation which, in this case, is 5 seconds.
Next, enable Keyframe Recording by clicking the tape button:
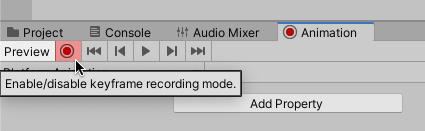
While Keyframe Recording is enabled, whatever changes you make to an object will exist saved to a Keyframe at that timeline position, such as irresolute its position:

Create a concluding Keyframe at ten seconds, setting the object's position to its original values to complete the animation (remembering to disable Keyframe Recording when you're finished).
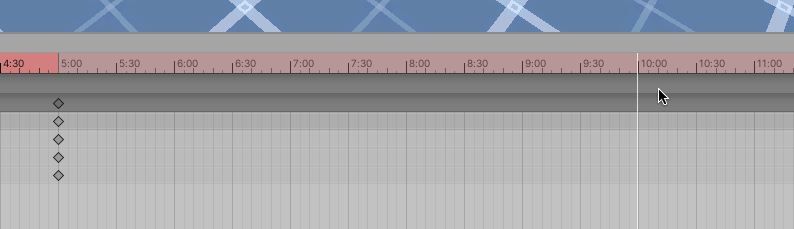
The terminate upshot is a platform that moves smoothly, and automatically, between its Keyframe positions.
These methods work well for creating controlled precise movements in Unity.
But, what if you don't want to control an object's motility precisely?
What if you'd rather push, pull or throw an object, to create movement using physical forces instead?
How to move an object using physics
Most rendered objects in Unity take a Collider component attached to them, which gives them a physical presence in the globe.
Withal, an object with only a Collider is considered to exist static, meaning that, generally speaking, it'due south not supposed to move.
To really move an object nether physics simulation, you'll also demand to add a Rigidbody component to it, which allows it to move, and exist moved, by concrete forces, such as gravity.
You can also move a physics object by applying force to its Rigidbody using the Add Force role.
Like this:
Rigidbody.AddForce(Vector3 force); This works in a like style to the Interpret role except that the vector you laissez passer in is a physical force, not a motion amount.
How much the object moves every bit a result volition depend on concrete properties such every bit mass, drag and gravity.
There are two principal means to apply physical force on an object.
You lot can either apply forcefulness continuously, building momentum and speed over time, or all at once in an impulse, like hit an object to move information technology.
By default, the Add Force role applies a continuous force, like a thruster gradually lifting a rocket.
Similar this:
public Rigidbody rb; public float forceAmount = 10; void FixedUpdate() { rb.AddForce(Vector3.upwardly * forceAmount); } Notice that I've used Fixed Update, and not Update, to employ the force to the object.
This is considering Fixed Update is called in sync with the physics arrangement, which runs at a different frequency to Update, which is oftentimes faster and can vary from frame to frame.
Doing it this way means that the application of forcefulness is in sync with the physics organisation that it affects.
Alternatively, you can likewise use force in a unmarried burst, using the Impulse Force Mode.
Like this:
public Rigidbody rb; public bladder forceAmount = x; void Starting time() { rb.AddForce(Vector3.upward * forceAmount, ForceMode.Impulse); } This will employ an amount of force to an object all at once:

Add Force tin exist used to push objects gradually, or apply force in a single hit, similar this.
Which can be useful for faster, more explosive movements, such equally making an object jump.
- How to jump in Unity (with or without physics)
At present information technology'due south your turn
How are y'all moving objects in your game?
Are y'all moving them using their Transform components?
Or are y'all moving them with physics?
And what have you learned about moving objects in Unity that you lot know others will discover helpful?
Whatever it is, permit me know by leaving a annotate.

My favourite fourth dimension-saving Unity assets
Rewired (the best input management arrangement)
Rewired is an input management nugget that extends Unity'southward default input organisation, the Input Managing director, adding much needed improvements and back up for modern devices. Put simply, it'south much more advanced than the default Input Manager and more reliable than Unity's new Input Organization. When I tested both systems, I plant Rewired to be surprisingly easy to use and fully featured, so I can understand why anybody loves it.
DOTween Pro (should be built into Unity)
An asset so useful, it should already exist built into Unity. Except it's non. DOTween Pro is an blitheness and timing tool that allows you to animate anything in Unity. You can motility, fade, scale, rotate without writing Coroutines or Lerp functions.
Easy Save (there'due south no reason not to use information technology)
Easy Save makes managing game saves and file serialization extremely piece of cake in Unity. So much so that, for the fourth dimension it would take to build a save system, vs the cost of buying Easy Salvage, I don't recommend making your ain save organization since Piece of cake Save already exists.
Source: https://gamedevbeginner.com/how-to-move-objects-in-unity/
0 Response to "How to Move Your Family to a New House in Skyrim"
Post a Comment